
Sourdough Bagels Made Simple
PUBLISHED ON: 02.22.2026
I understand the sourdough craze. It makes sense.
We live in a world that rarely slows down. There is constant noise. Sourdough baking creates a pause. It asks for patience, attention, and a willingness to work at a slower pace. You grow a starter, name it, feed it, learn its rhythm, and over time it becomes familiar. It is simple, but it feels intentional.
Retreating to the kitchen has become a way to simplify things. Most of us are not homesteaders, yet many of us feel drawn to the idea of getting back to basics. That life may be far removed from our everyday reality, but baking allows a small version of it to exist at home. Making bread becomes steady and grounding, even when everything else feels busy.
The more I bake with my sourdough starter, the more confident I become. This past week, with jazz playing in the background, I decided to try sourdough bagels.
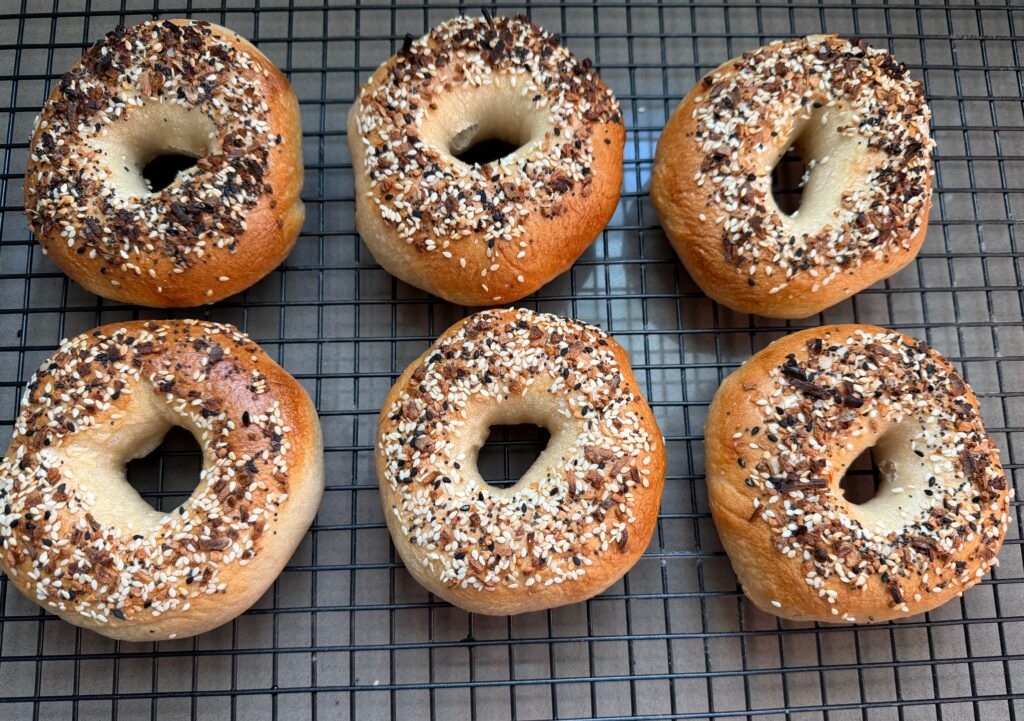
The photo you see is from my second batch. The first batch tasted great, but visually they looked more like bagel buns. The second time around, I decided to become the boss of my bagel holes and stretched the holes generously and confidently by hand. This one adjustment made all the difference.
I do not enjoy complicated cooking or baking unless I am paying for it in a restaurant. These bagels fit my style. The recipe uses five ingredients: sourdough starter, flour, water, honey, and salt. Straightforward and manageable.
I followed Grant Bakes on YouTube because I am a visual learner. Watching the process helped clarify shaping and timing and made the recipe feel approachable.
Sourdough bagels are not about perfection. They are about slowing down, keeping things simple, and learning by doing. This alone makes them worth baking.
 Inspired by Grant Bakes
Ingredients:
100 g active sourdough starter
225 g water
20 g honey
500 g of bread flour
10 g Kosher salt
For Boiling:
2 Tablespoons honey or Sugar
Large pot of water
Directions:
In a large bowl, or stand mixer bowl, stir together the sourdough starter, warm water, and honey until mostly dissolved.
Add the bread flour and salt. Mix until a shaggy dough forms and no dry flour remains.
Option 1: By Hand
Turn the dough onto a clean surface and knead for 8–10 minutes. The dough should become smooth and firm. Bagel dough is intentionally stiff, so it will feel tighter than sandwich bread dough.
Option 2: Stand Mixer
Place the dough in a stand mixer fitted with a dough hook. Mix on low speed for 6–8 minutes until the dough becomes smooth and pulls away from the sides of the bowl. The dough will be firm and slightly dense, which is exactly what you want for chewy bagels.
Place the kneaded dough in a lightly covered bowl and let it rest 8–12 hours at room temperature, or until slightly puffy. It will not double in size like traditional bread.
Turn the dough onto the counter and divide into 8 equal pieces. Shape each piece into a tight ball. Let the balls rest for 10–15 minutes.
To form the bagels, poke your thumb through the center of each ball and gently stretch to create a hole. Stretch more than you think you need. This is the moment to become the boss of your bagel holes. They will shrink slightly during resting and baking.
Place shaped bagels on a parchment-lined baking sheet. Cover and let rest 1–2 hours at room temperature, or refrigerate overnight for deeper flavor.
Preheat oven to 425°F.
Bring a large pot of water to a gentle boil. Add honey.
Boil bagels 30–60 seconds per side. A longer boil creates a chewier crust.
Remove with a slotted spoon and return to the baking sheet. Add toppings immediately if using.
Bake 20–25 minutes until golden brown. Cool on a wire rack before slicing.
Notes for Success:
Use active starter for best rise.
Bread flour gives the best chew and structure.
Do not skip the boil. That is what gives bagels their signature texture.
Stretch the holes generously ( Remember you are the boss) before boiling. They will tighten up.